Blog › Uncensored male text-to-video AI: How to create private adult videos with Animator Hub
Uncensored male text-to-video AI: How to create private adult videos with Animator Hub
Uncensored male text-to-video AI: create private adult clips with clear prompts, modes, costs, and safety tips.
Key Takeaways
Uncensored male text-to-video AI gives adult creators a direct way to turn written scene ideas into short video clips. A good workflow combines clear prompts, careful mode selection, private library settings, and respect for consent and age rules.
- Start with an adult male character whose age is clearly 18 or older.
- Describe appearance, clothing, movement, setting, lighting, and camera work in plain language.
- Use Text-to-Video for original scenes, Image-to-Video for still references, and Video-to-Video for source footage.
- Track the one-credit-per-second pricing model before submitting longer clips.
- Keep private work in your library and check the Content Policy before sharing.
What uncensored male text-to-video AI can do
Uncensored male text-to-video AI is useful when a creator wants more control over adult visual work than heavily filtered tools allow. The basic process is simple: describe a subject and scene, set the production details, then review the result. For adults who want a private workflow, Animator Hub presents video generation from text, images, or existing footage with 1080p output.
The quality of a result still depends on the prompt and the source material. Short clips work best when the action is easy to follow and the subject has a stable description from the first frame to the last. Think in shots rather than trying to describe an entire film in one request.
Generate male characters from written prompts
A written prompt can establish an adult male character, his setting, his clothes, his pose, and the action taking place around him. Start with one clear subject and one main action. If the scene contains several people or competing movements, the generator has more details to reconcile and the output may be less consistent.
Use direct language such as “adult man, 30 years old, short dark hair, standing beside a window” before adding atmosphere or camera movement. State the age plainly rather than relying on words such as “young,” which can create ambiguity in an adult context.
Control appearance, personality, and visual style
Appearance details give the model a visual anchor, while personality words can guide expression and body language. A calm character might have a relaxed posture and a steady gaze; a playful one might smile, turn toward the camera, or move with lighter energy. Keep those signals compatible with the action you request.
You can also specify realistic or anime treatment, wardrobe, color palette, and the general mood of the shot. The strongest prompts usually put the subject first, then the action, then the environment and style. That order makes the scene easier to read.
Create realistic, anime, and cinematic scenes
A realistic scene benefits from physical details such as natural skin texture, practical lighting, and a believable location. Anime scenes respond better to clear visual direction about line quality, cel shading, color, and expressive motion. Cinematic prompts can combine either approach with shot size, lens choice, depth of field, and camera travel.
Keep the style consistent across the prompt. Mixing several unrelated visual treatments can make faces, clothing, and backgrounds drift. For more prompt ideas and vocabulary, the Animator Hub Blog provides guides related to adult video and image generation.
Understand the platform’s adult-only focus
Adult access is part of the workflow, not a detail to skip. The platform requires users to be 18 or older and to verify age on the first visit. Its content rules allow adult content but place a hard limit on content involving minors, including any sexual abuse material involving minors.
That means an adult character should be described with an unambiguous age and adult context. A private adult project still needs to follow the service rules, and “uncensored” does not remove the need for consent or lawful use of a person’s likeness.
How to create a video with Animator Hub
The creation flow is built around short, defined generations rather than a long editing timeline. You choose a mode, enter a prompt or source, set the output controls, and submit the request. Animator Hub supports Text-to-Video, Image-to-Video, and Video-to-Video, with durations and framing selected for each generation.
Before you press generate, read the prompt once as if it were a shot brief. Remove details that do not affect the scene, and make sure the subject’s age is clear. This small pause often saves credits and gives the first result a cleaner direction.
Start with the Text-to-Video mode
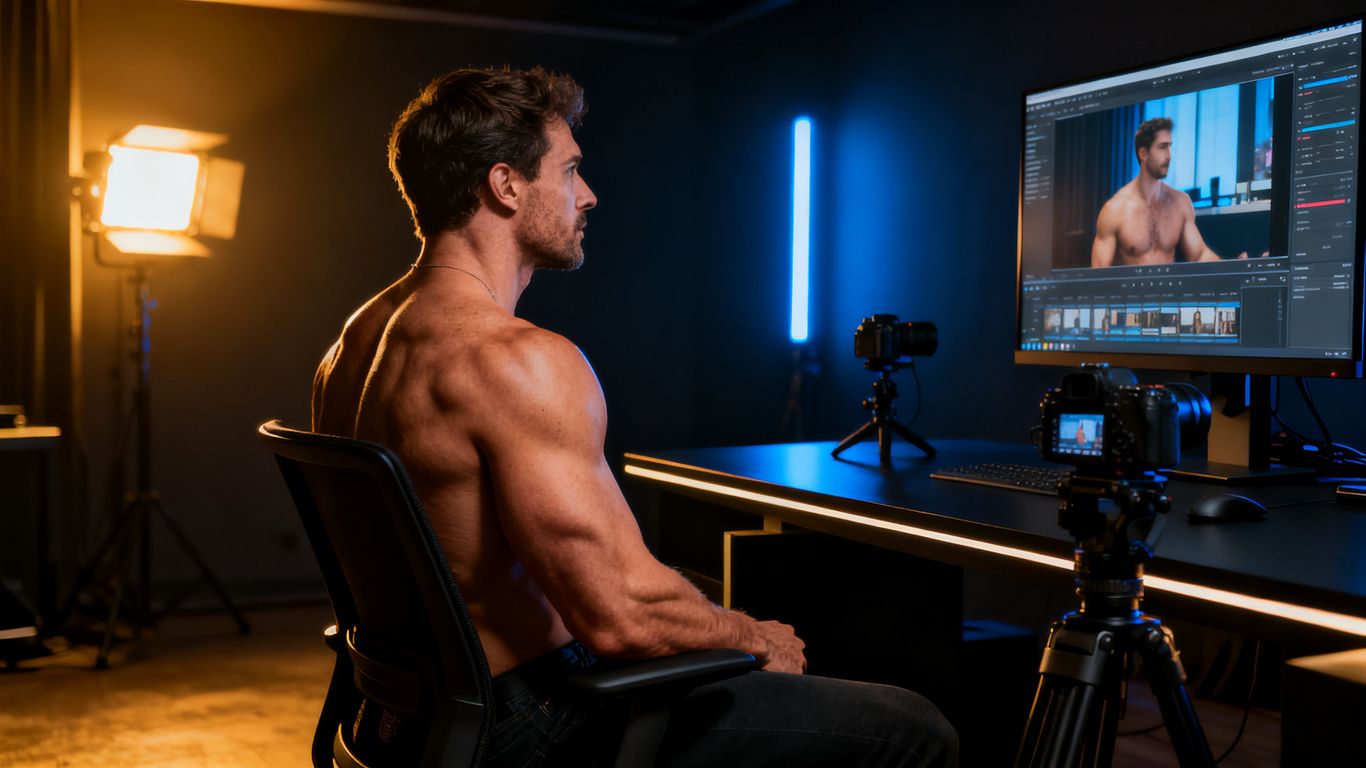
Choose Text-to-Video when you are starting from a written scene rather than an uploaded still or video. The mode accepts plain-language descriptions that can include the subject, environment, lighting, camera movement, and style. It is a practical starting point for an original male character and a self-contained adult scene.
Begin with a short test prompt before expanding the shot. A five-second result can tell you whether the face, pose, wardrobe, and overall style are moving in the right direction.
Describe the subject, setting, and action
A useful prompt has a simple internal order: who is present, where they are, what they do, and how the camera sees it. For example, describe an adult man in a private bedroom, then give one controlled movement such as turning toward the lens or sitting on the edge of the bed.
Add sensual or explicit details only when they are relevant to the intended adult scene. Avoid vague wording, contradictory instructions, and multiple major actions in the same short clip. Specific scene direction gives the model a better basis for motion and composition.
Choose duration, aspect ratio, and shot type
The available Text-to-Video durations are 5, 10, and 15 seconds. Image-to-Video uses the same duration choices, while Video-to-Video supports 5- or 10-second outputs. Aspect ratio and shot type help match the clip to its destination, whether that is a vertical mobile post, a square preview, or a wider cinematic frame.
Choose a shot size that suits the action. A close shot is useful for facial expression, while a medium or wide shot gives the body and environment more room. Avoid asking a tight close-up to show a complex full-body movement.
Review credits and submit the generation
Check the duration and your available balance before submission. The service shows generation progress and provides completion notifications, so you can leave the request running rather than repeatedly refreshing the page. Failed or expired generations can be regenerated with the original prompt and settings pre-filled.
Use the preview to judge one issue at a time: identity, anatomy, motion, lighting, or framing. If the result is close, change only the weak part in the next prompt instead of rewriting everything.
How to write effective prompts for male characters
Prompt writing is less about length than order. A clean description gives the generator a subject, an action, a place, and a visual treatment that do not fight each other. You can then add camera and motion details once the basic shot is stable.
The in-app Guide includes prompt formulas, worked examples, aesthetic vocabulary, dynamic camera terms, and negative-prompt guidance. Those references are useful when a scene looks technically polished but does not match the original idea.
Define age, appearance, clothing, and pose
Start with “adult man” and a specific age, then describe the features that should remain visible. Hair, body type, facial hair, clothing, and pose all matter, but too many small traits can compete for attention. Select the details that define the character for this particular shot.
State what the body is doing in a simple phrase. “Standing in profile with one hand resting on the table” is easier to interpret than a paragraph describing several poses in sequence.
Add lighting, camera, composition, and lens details
Lighting sets the mood and helps separate the character from the background. You might request warm bedside light, cool window light, soft shadows, or a high-contrast studio setup. Camera terms then define how the viewer receives the scene: close-up, medium shot, over-the-shoulder view, slow push-in, or locked-off frame.
Lens language can be useful when it supports the composition. A shallow depth of field keeps attention on the face, while a wider lens shows more of the room. Use two or three strong visual decisions rather than naming every camera technique you know.
Use motion and cinematic vocabulary
Video prompts need verbs. Ask for a slow turn, a measured step, a relaxed stretch, fabric shifting as the subject moves, or a gradual camera pan. These instructions create a sense of time and give the generator something concrete to animate.
Keep movement physically plausible for the length of the clip. One primary action plus a small camera move is often enough for a five-second generation. Longer outputs can support a second beat, but the transition should be clear.
Improve results with negative prompts
Negative prompts help identify problems you do not want, such as extra fingers, warped anatomy, face drift, duplicate subjects, unstable eyes, or abrupt camera changes. They are most useful when they respond to a visible failure rather than becoming a long list of every possible defect.
A practical revision cycle looks like this:
- Review the first frame for age, identity, and wardrobe.
- Watch the motion for body continuity and unwanted extra limbs.
- Check the background for objects that change shape.
- Add only the negative terms connected to those problems.
After that pass, regenerate with the same core description. This makes it easier to tell whether the negative prompt improved the shot or whether another part of the request caused the problem.
Choosing the right generation mode
The best mode depends on what you already have. Text-to-Video starts with language, Image-to-Video starts with a still, and Video-to-Video starts with footage that needs a visual change. Multi-shot narrative mode is suited to planning a longer sequence with timestamps rather than treating every shot as unrelated.
Choosing the right starting point can preserve more of the character’s look and reduce unnecessary revisions. It also helps you spend credits on the part of the process that needs movement, style changes, or a new scene.
When to use Text-to-Video for original scenes
Use Text-to-Video for a scene that exists primarily as an idea. It is a natural choice when you want to define the adult male character, room, action, camera, and visual style from scratch. The mode is also useful for testing several different settings before committing to a reference image.
Keep each request focused on one short moment. If you need a sequence of connected shots, generate a strong base look first and carry the useful descriptors into the later prompts.
Animate a reference image with Image-to-Video
Image-to-Video begins with a PNG, JPG, or WEBP still and applies motion, expressions, and scene dynamics described in the prompt. Use it when the character’s starting appearance matters more than generating a new face from text. The preview adapts to the image’s true aspect ratio.
Your prompt should describe movement that fits the still. A front-facing portrait can support a subtle head turn or expression change, while a full-body image gives more room for a step, pose change, or camera move.
Restyle footage with Video-to-Video
Video-to-Video accepts up to three source clips in MP4 or MOV format, with each source between 2 and 30 seconds and no more than 100MB per file. It can apply style changes, modify scenes, restyle footage, or change clothing and environments. Available output durations are 5 and 10 seconds.
Use this mode when the timing or performance already works and the visual treatment needs to change. Review the rights attached to the source footage before uploading it, especially when another person is visible.
Build longer sequences with multi-shot narrative mode
Multi-shot narrative mode helps plan a longer cinematic sequence with timestamps. Break the story into short beats, such as an entrance, a pause, a close reaction, and a final camera move. Each beat should have a clear purpose and a consistent description of the character.
Do not expect one prompt to solve every continuity issue. Treat the mode as a plan for connected shots, then inspect the transitions and regenerate weak sections as needed.
Managing privacy and creative control
Privacy settings determine whether a finished clip stays in your personal library or appears in the public Explore gallery. Uploaded files are stored privately and tied to the account, while public sharing is a separate choice. This distinction matters for adult work, personal experiments, and any scene that includes a recognizable reference.
A private workflow also benefits from basic file organization. Give clips meaningful album names, retain only the versions you need, and avoid uploading material that you do not have permission to use.
Keep generated videos private in My Videos
My Videos is the private library for generated clips. From there, you can view status, watch completed work, download files, change visibility, or delete individual videos. Keep the visibility setting private while you review a new generation.
Privacy is not the same as permission. A private file can still depict a real person without consent, so the creative decision and the storage decision should be handled separately.
Organize clips with albums and bulk actions
Albums are useful when a project contains multiple versions of the same character or scene. You can create, rename, and delete albums, reorder clips with drag-and-drop, and add or remove videos through the context menu. Bulk selection also supports deleting several videos or adding several clips to an album.
A simple naming system helps: character, scene, take, and date. That makes it easier to compare revisions without opening every thumbnail.
Download, regenerate, hide, or delete videos
Completed videos can be downloaded, hidden from public view, or deleted. Failed and expired generations can be regenerated with the original prompt, duration, ratio, and negative prompt restored. These controls let you keep a promising setup while removing a result that does not belong in the library.
Download only to storage you control, especially for explicit files. If a clip is no longer needed, deleting it is cleaner than leaving several unused copies across devices.
Share selected creations through the Explore gallery
The Explore gallery contains community videos that creators have chosen to make public. It supports filtering by generation mode, hover previews, prompt overlays, duration badges, and an aspect-ratio-aware player. Sharing should be a deliberate final step after you have checked the content, consent, and policy requirements.
If a clip is meant for a small private audience, use a separate approved sharing method rather than assuming the public gallery is appropriate. Public visibility can change how widely a creation travels.
Credits, payments, and video-generation costs
The pricing system is designed around generated seconds rather than a recurring subscription. One credit equals one second of generated video, so duration is the main cost variable. Short tests are a sensible way to check a prompt before spending on a longer take.
Animator Hub lists the wallet balance, transaction history, and top-up options on its Credits page. Credits do not expire once purchased, which makes it easier to work in occasional sessions instead of rushing to use a monthly allowance.
Understand the one-credit-per-second pricing model
A 5-second clip uses 5 credits, a 10-second clip uses 10 credits, and a 15-second clip uses 15 credits. The rule applies directly to the rendered duration, so doubling the length roughly doubles the credit requirement. Keep this relationship in mind when comparing alternate takes.
The package rate changes with the amount purchased. The table below shows the listed package prices and their effective per-second rates.
| Package | Price | Effective rate | Position |
|---|---|---|---|
| 100 credits | $30 | $0.30 per second | Starter |
| 500 credits | $125 | $0.25 per second | Most popular |
| 1,000 credits | $200 | $0.20 per second | Best value |
The package price is not a separate fee for each clip. It is the amount added to the wallet, and each generation draws credits according to its duration. Failed or expired work should still be checked in the account before you submit another version.
Compare the 100-, 500-, and 1,000-credit packages
The 100-credit package suits small tests or occasional use. The 500-credit option lowers the effective rate for creators who expect several rounds of revisions, while the 1,000-credit package has the lowest listed rate for heavier production. Choose based on planned use rather than buying more credits simply because the unit rate is lower.
A live wallet balance and transaction history make it easier to see what remains after a group of generations. Low-credit warnings also appear before generation begins.
Estimate the cost of 5-, 10-, and 15-second clips
At the listed package rates, the approximate rendering value looks like this:
| Clip length | Credits used | At $0.30 rate | At $0.25 rate | At $0.20 rate |
|---|---|---|---|---|
| 5 seconds | 5 | $1.50 | $1.25 | $1.00 |
| 10 seconds | 10 | $3.00 | $2.50 | $2.00 |
| 15 seconds | 15 | $4.50 | $3.75 | $3.00 |
These figures describe the effective value of each package, not separate checkout charges. A creator can use them to estimate how many tests and final takes fit within a wallet balance.
Use cryptocurrency payments and monitor your wallet
Cryptocurrency payments support BTC, ETH, USDT, and other listed currencies. The Credits page provides the current balance, quick top-up access, transaction history, and payment confirmation polling. Credit card payments are listed as coming soon in the source material.
Check the balance after payment confirmation and before starting a batch of generations. That simple habit keeps a long sequence from stopping halfway through because the wallet ran low.
Safety, consent, and platform requirements
Adult creative freedom still needs clear boundaries. The service is for users aged 18 and older, and its content rules prohibit material involving minors. Consent, likeness rights, and source-file ownership remain the creator’s responsibility even when a result is generated privately.
Read the full adult video workflow material only as general background, then rely on the service’s own Content Policy, Terms of Service, and Privacy Policy for the rules that apply to your account. Policy pages can change, so check them close to publication or sharing.
Follow the 18+ age-verification requirement
Users must confirm that they are 18 or older at the first visit. Do not try to bypass the age gate or create material for an underage audience. Keep account access private and use the platform only for lawful adult creation.
Age verification is a baseline requirement, not a substitute for checking the details of an individual scene. The character, source image, and intended use all need adult context.
Avoid content involving minors or ambiguous ages
Never include minors or ambiguous ages in an adult prompt, reference image, or uploaded video. Words such as “teen,” “schoolgirl,” “young-looking,” or similar signals create an unsafe and disallowed premise even if the prompt later claims the subject is an adult.
Use a clear adult age and adult setting when age is relevant to the scene. If the reference leaves age uncertain, do not use it for adult generation.
Use characters and references you have permission to depict
Only use your own characters, licensed material, or references provided with permission. A real person’s face, body, voice, photograph, or video should not be placed into an explicit scene without informed consent. The same principle applies when editing or restyling uploaded footage.
Keep records of permissions for professional work. This is especially useful when a private experiment becomes a published commission or a paid fan project.
Review the Content Policy before publishing creations
The Content Policy sets the hard limits for the platform, including the ban on content involving minors and the requirement that users be 18 or older. The footer links to the Content Policy, Terms of Service, and Privacy Policy, so review those documents before making a creation public.
A final check should cover age, consent, source rights, visibility, and the intended audience. If any answer is unclear, keep the file private and resolve the issue before sharing.
Conclusion
Uncensored male text-to-video AI works best as a controlled short-form workflow: define an unmistakably adult subject, write a focused shot prompt, select the mode and duration that fit the source, then review privacy, credits, consent, and policy before sharing. With that process, adult creators can spend less time fighting vague prompts and more time refining the scenes they actually want to make.
Frequently Asked Questions
What is uncensored male text-to-video AI?
It is a video-generation workflow that turns written descriptions of adult male characters, settings, actions, and visual styles into short clips with fewer content filters than mainstream tools. It still requires lawful use, adult subjects, and compliance with the platform’s rules.
How should I state a character’s age?
Use an explicit adult age, such as “30-year-old man,” and avoid vague terms like “young.” Clear age language reduces ambiguity and helps keep the prompt within adult-only requirements.
Is text-to-video better than image-to-video?
Neither mode is always better. Text-to-Video suits an original scene, while Image-to-Video is useful when you already have a still image whose appearance you want to animate.
How long should a first test clip be?
A short five-second test is often a practical starting point. It lets you check identity, pose, motion, lighting, and framing before spending credits on a longer version.
Can I use a real person’s image in an adult video?
Only with that person’s informed permission and where the use is lawful. Private storage does not remove consent or likeness-rights obligations.
What should a negative prompt include?
Start with defects you can actually see, such as face drift, extra limbs, duplicate subjects, warped hands, or unstable backgrounds. A short, targeted negative prompt is usually easier to assess than a long generic list.
How can I keep adult generations private?
Keep visibility set to private, use account-controlled storage, limit downloads to trusted devices, and avoid placing files in public galleries unless you have checked consent, source rights, and the applicable content rules.